question

Gabriel I6 avatar image
0 Likes"
Gabriel I6 asked Gabriel I6 answered

Criar objetos a partir de um banco de dados

Sou novo e ainda não tenho muito conhecimento com o FlexSim, estou fazendo uma tentativa de a partir de uma banco de dados que conectei ao flexsim fazer a criação de objetos e plota-los sobre um rack. Fiz um Process flow onde me conecto ao banco de dados e faço os imports de dados para a minha aplicação, o problema maior está sendo na parte da criação dos objetos a partir do banco. Caso vocês conheçam algum tutorial que ensine a como fazer este processo seria de grande valia.

Muito Obrigado.

FlexSim 22.0.0
sql
· 1
5 |100000

Up to 12 attachments (including images) can be used with a maximum of 23.8 MiB each and 47.7 MiB total.

Andrew O avatar image Andrew O commented ·

Hi @Gabriel I6, was Kavika F's answer helpful? If so, please click the "Accept" button at the bottom of their answer. Or if you still have questions, add a comment and we'll continue the conversation.

If we haven't heard back from you within 3 business days we'll auto-accept an answer, but you can always unaccept and comment back to reopen your question.

0 Likes 0 ·
Kavika F avatar image
1 Like"
Kavika F answered

Hey @Gabriel I6, if you've already imported your data from a database into a Global Table in the model, then you're almost there! All we need to do now is create the objects inside the rack.

You can read more about how racks work with this overview or with this code documentation on Storage.object.

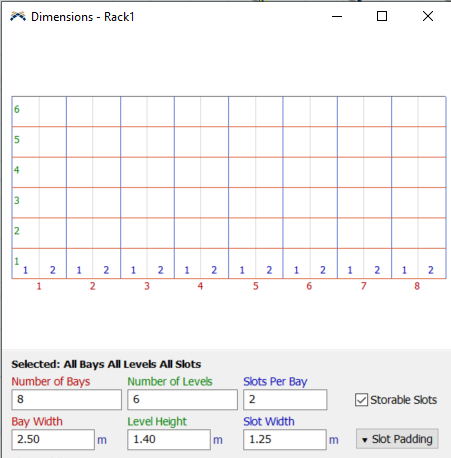
Racks have dimensions like this:

1659725312910.png

Red numbers denote bays (columns), green numbers denote levels (rows), and blue numbers represent slots (smaller divisions within a bay). If your table has specific bays, levels, and slots, then you can assign those values to labels on an object and have the rack store it where it needs to be.

Here's an example Table:

1659727786918.png

And an example Date Time Source from Process Flow (PF):

1659727837506.png

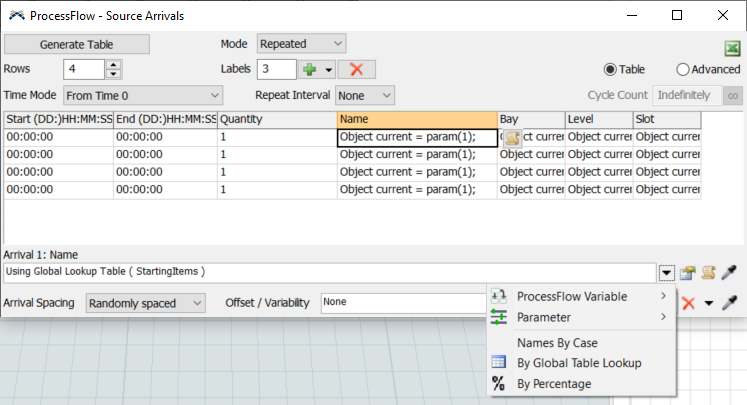
If you click Edit Arrivals, then the right window will popup and you can fill out the values. Add the number of rows and labels you need. Under each label (i.e., Name, Bay, Level, Slot), you can have the value be from a Global Table. Choose "By Global Table Lookup" for the value:

1659727916130.png

And then you can fill out the right information:

1659727932108.png

"Table" will have the table name; "Row" will have rowNumber (it will match whatever row in the arrival table it is on); "Column" is the number or name of the column.

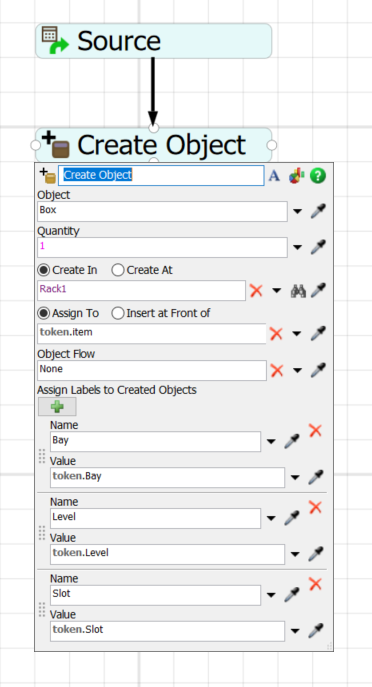
Once that's set up, you can add a "Create Object" activity in the PF connected to the Source.

1659728190884.png

Notice that under "Create In" that I have a reference to the Rack we made earlier. You can attach a rack by clicking on the dropper next to the option and then click on the rack. I also attached all the labels from the token (i.e., Bay, Level, and Slot) to the flowitem box being made in the rack. That way I can have the rack assign incoming items by their labels.

1659728294878.png

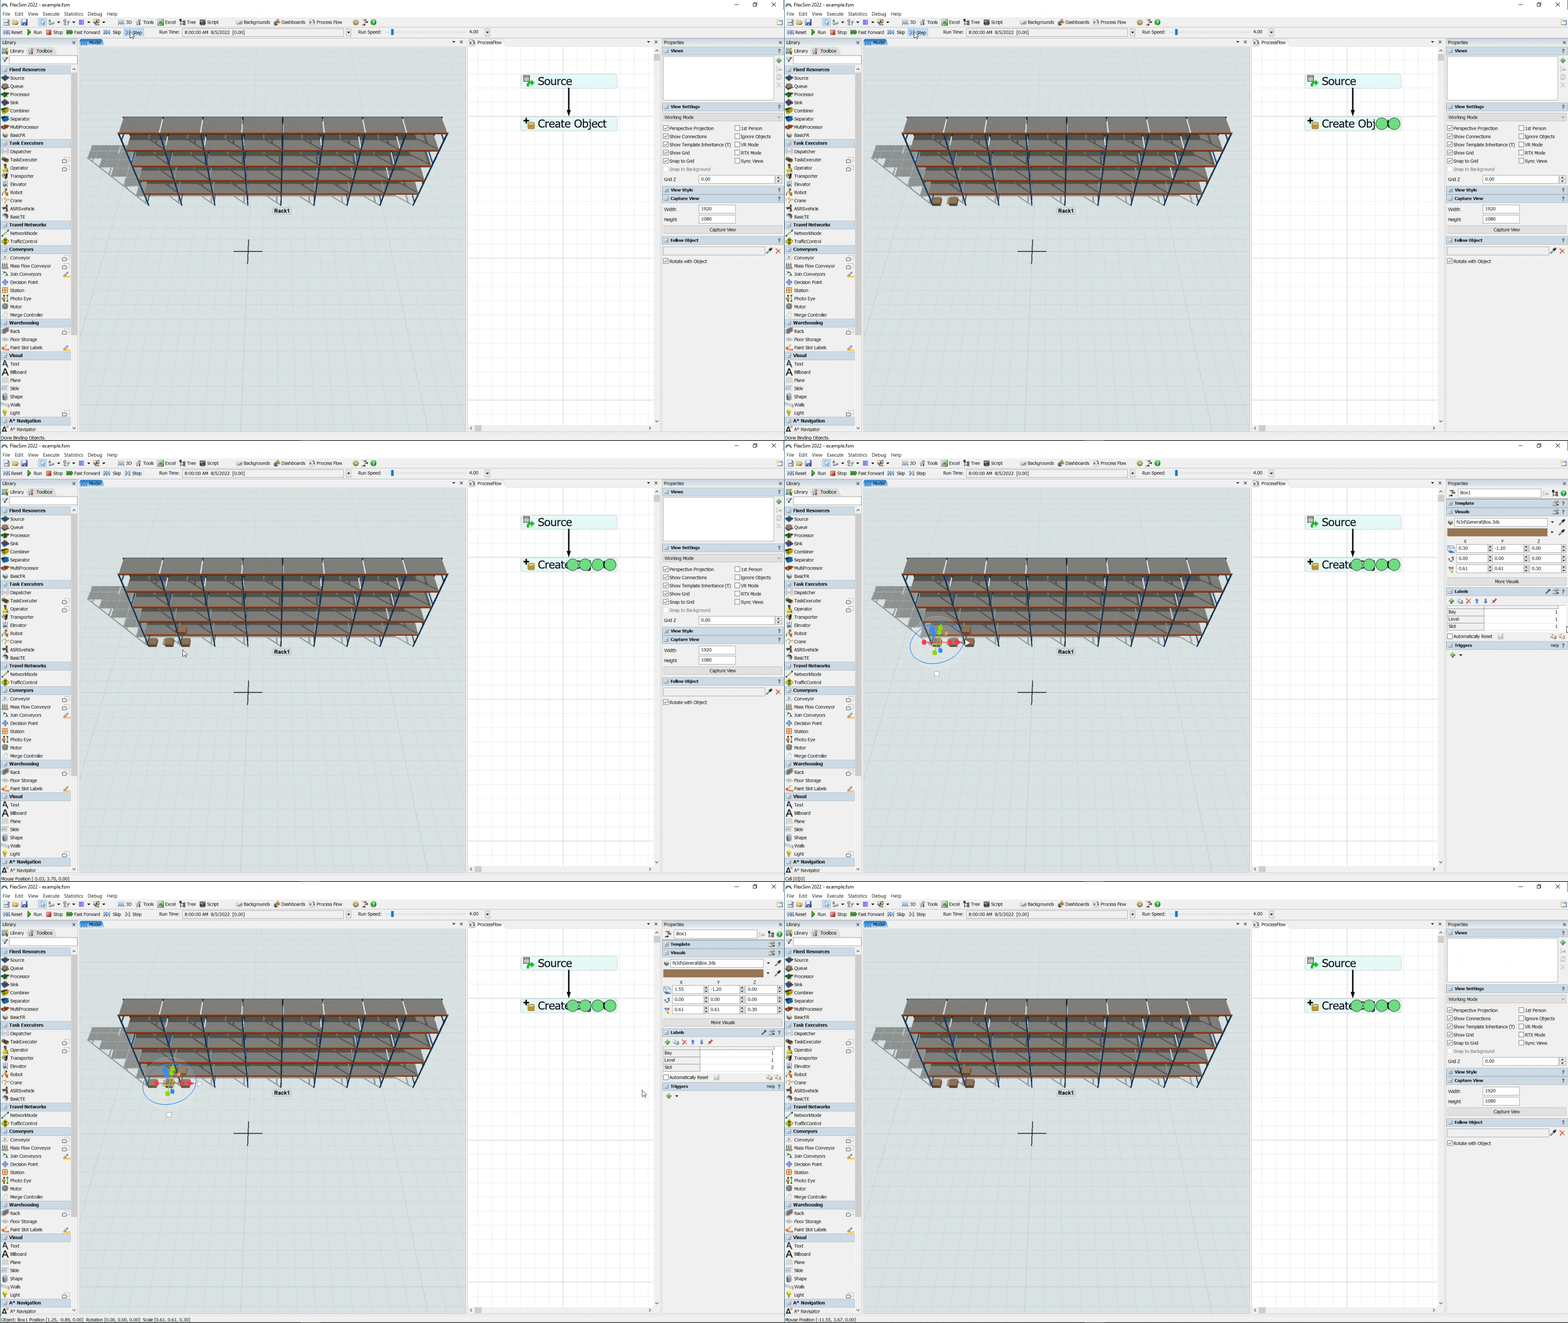
After it's all put together, you get this behavior:

finished-logic.gif

As I step through, each box is created at the bay, level, and slot it has assigned to it.


1659725312910.png (36.4 KiB)
1659727786918.png (12.9 KiB)
1659727837506.png (126.3 KiB)
1659727916130.png (122.6 KiB)
1659727932108.png (15.6 KiB)
1659728190884.png (71.9 KiB)
finished-logic.gif (2.3 MiB)
1659728356350.png (236.9 KiB)
5 |100000

Up to 12 attachments (including images) can be used with a maximum of 23.8 MiB each and 47.7 MiB total.

Gabriel I6 avatar image
0 Likes"
Gabriel I6 answered

Thank you so much for the answer.

5 |100000

Up to 12 attachments (including images) can be used with a maximum of 23.8 MiB each and 47.7 MiB total.