question

pc neo avatar image
0 Likes"
pc neo asked Jason Lightfoot commented

flexsim web server with IIS installation doc clarification

hi, I have installed and run FlexSim Webserver as a standalone successfully.

Now I am attempting to use IIS, which is new to me. I have followed the documentation on Webserver (flexsim.com), it has an instruction to add "Server Variables" which is done on a different Site name "FlexSim WebServer" and there is no instruction on how this site is defined.

a) Some guidance is needed on the installation as above.

fyi. Presently, I am not able to get the FlexSim to launch on the server end when "Start New Instance" is clicked. Perhaps it is related to the above configuration. The log shows "instance [1] launched [500], ERROR: GET 3D server fault".

FlexSim 23.2.0
installationwebserver iis
5 |100000

Up to 12 attachments (including images) can be used with a maximum of 23.8 MiB each and 47.7 MiB total.

1 Answer

Paul Toone avatar image
0 Likes"
Paul Toone answered Jason Lightfoot commented

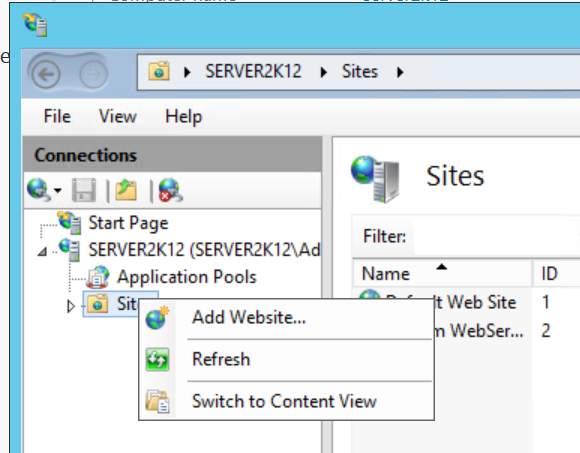
@pc neo In order to add the FlexSim WebServer site, you need to right-click on 'Sites' in IIS Manager and choose 'Add Website'.

1692985713751.png

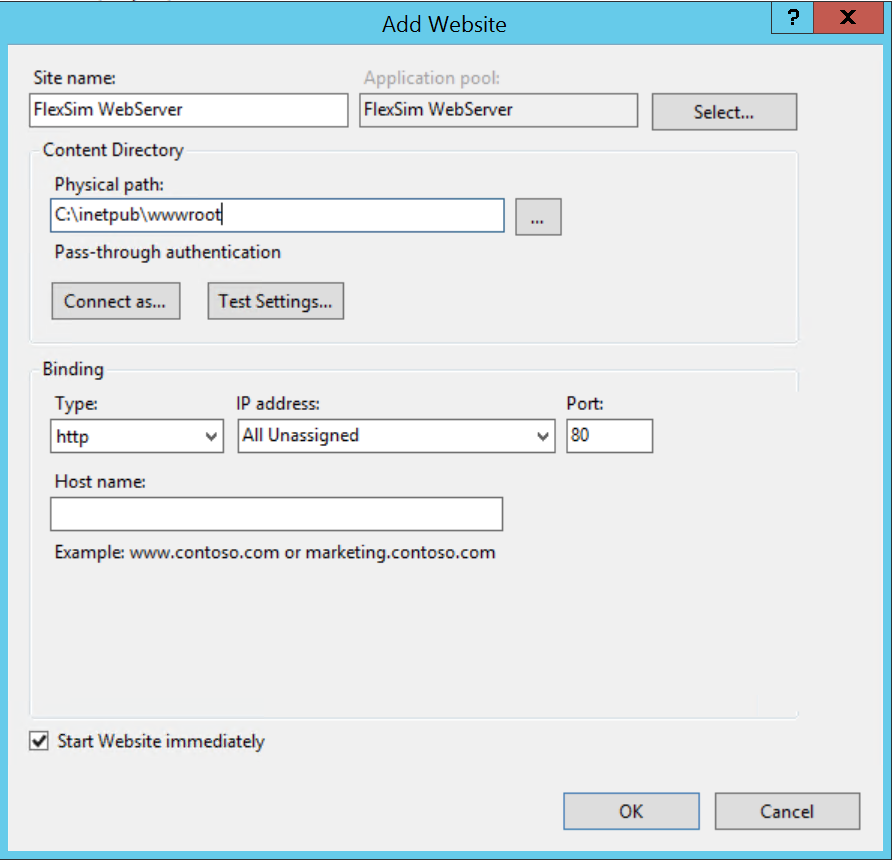
Then, you need to enter 'FlexSim WebServer' in the Site name dialog box. Then, enter 'C:\inetpub\wwwroot' as the Physical Path, then choose OK.

1692985827258.png


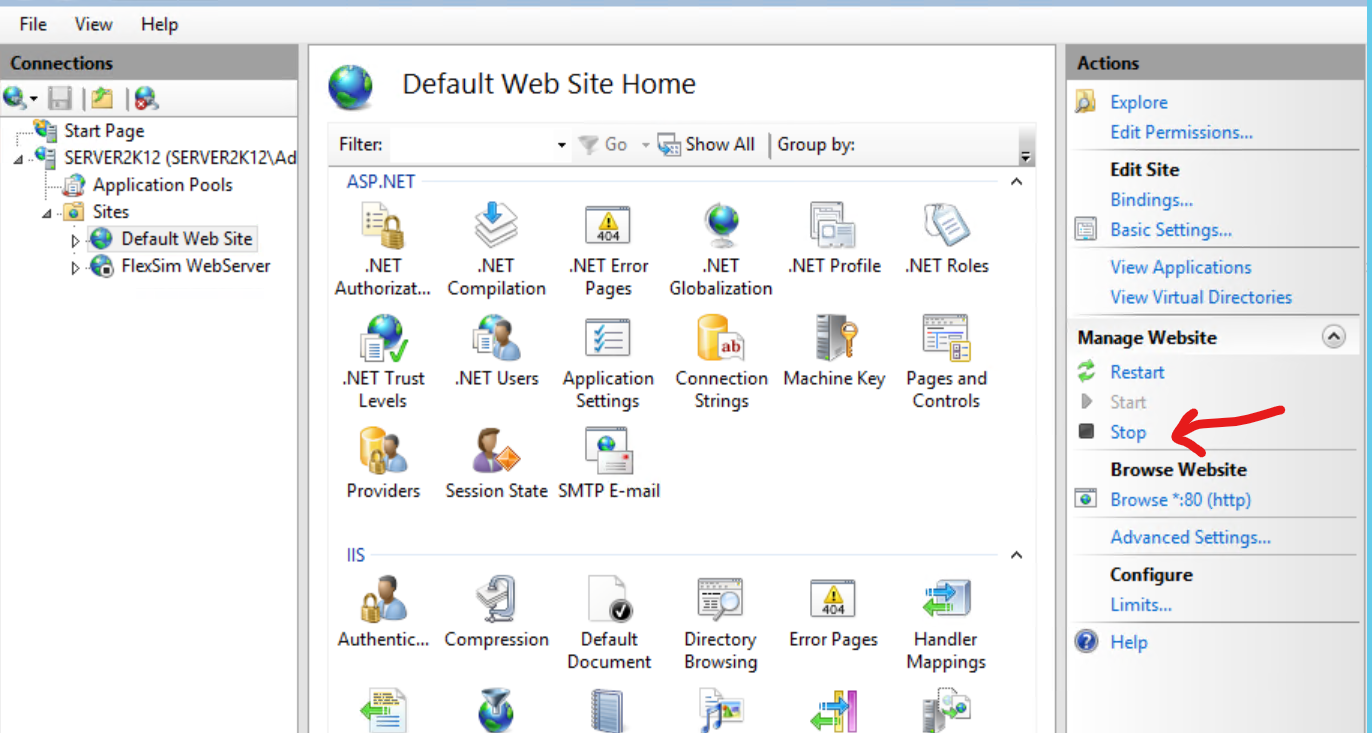
Please note, the Default website is likely already started in IIS on port 80. You'll need to stop that website in order to start the new FlexSim WebServer website you just added.

1692985957140.png

After you have stopped the Default Web Site, you can select the FlexSim WebServer site and start that service.


Please let me know if you need any further assistance and if this method resolves your instance [1] launched [500], ERROR: GET 3D server fault" error.


1692985713751.png (103.6 KiB)
1692985827258.png (126.6 KiB)
1692985957140.png (429.5 KiB)
· 2
5 |100000

Up to 12 attachments (including images) can be used with a maximum of 23.8 MiB each and 47.7 MiB total.

pc neo avatar image pc neo commented ·
@Paul Toone Thank you for your detailed explanation. I've followed the above configuration, but it does not solve the issue.


Currently I found that the documented instructions worked well on a Windows 10/11 Home OS, but not on a Windows 11 Pro OS, not sure why. These are deduced from my attempts on 3 different machines.


The steps are correct, so I'll accept the answer for this post.

0 Likes 0 ·
Jason Lightfoot avatar image Jason Lightfoot ♦♦ pc neo commented ·

Question about Win11Pro here.

0 Likes 0 ·