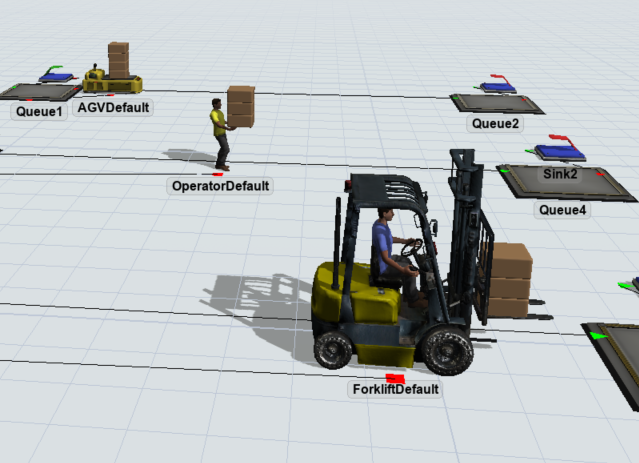
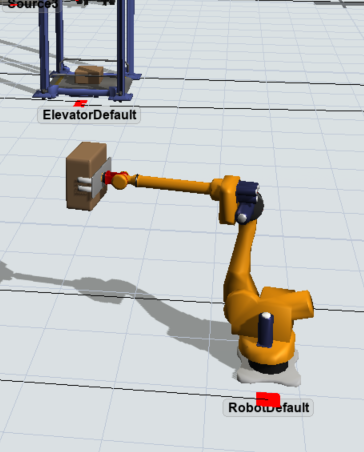
Changing the packing method for task executers can be tricky and also can vary widely between types. In this article we'll explore the default packing method for each TE and how to alter it to suit the model's needs. Attached is a model which demonstrates the default packing method and the comparison. The model is also the best place to get premade code for the ASRS, the crane, and the Robot:
Default Stacking on Task Executers
There are two types of default stacking methods on the TE's.
AGV's, operators, forklifts, ASRS, and basicTE's all use a simple up and down stacking method:
The other TE's (elevator, robot, and crane) don't separate the boxes at all so they all look like they're on top of each other (this is because they're mostly meant to only carry one item at a time):
Changing the Stacking Pattern:
AGV, Operator, & BasicTE:
For these objects, changing the stacking method is relatively simple.
- Add 5 labels to the object: numx, numy, xshift, yshift, and zshift
- Add an OnLoad trigger in the properties panel
- Set the trigger by going to Visual->Set Location
- Type in this code
- current.xshift+item.size.x*((item.rank-1)%current.numx)
- -current.yshift+item.size.y*(Math.floor(((item.rank-1)/current.numx)%current.numy) - (current.numy-1)/2)
- current.zshift+item.size.z*Math.floor((item.rank-1)/current.numx/current.numy)
The only thing that differs between these 3 objects are the label values. The labels "numx" and "numy" sets the number of objects in the x direction and how many in the y direction. For example a 3x3 grid on the AGV would set "numx" be 3 and "numy" be 3
| xshift | yshift | zshift | |
| AGV | 1 | .5 | .5 |
| Operator | .75 | .29 | 1.10 |
| BasicTE | 0 | 0 | .85 |
Elevator, Robot, & Crane:
These objects are very similar to the TE's above. You'll follow the same steps above, except on the On Load trigger, choose to just paste custom code in the box. They have slightly different code (due to the different direction/ways of stacking) that you can copy from the model above. However, you will still add the labels to the TE's. You can set them using labels like these:
| xshift | yshift | zshift | |
| Elevator | .7 | 1 | .095 |
| Robot | .34 | .35 | .2 |
| Crane | .2 | .5 | -.25 |
Forklift:
This is the easiest object to change because it is already built into the TE.
To change the stacking pattern just add an OnEntry trigger and select Transporter Stacking Method, then just change the values to be what you would like.
ASRS:
For this one, you can change the stacking method by editing the model tree.
The steps to change it are simple but specific:
- Open the model tree for the object by right clicking and selecting Explore Tree
- Find the behaviour node beneath the ASRS Node
- Add an node underneath called "eventfunctions"
- Beneath the node you just created add a node called "OnPreDraw"
- Paste in that node the code below (you can edit this to alter the stacking method how you would like):
- inheritcode();
- TaskExecuter current = c;
- Object followingObj = first(current);
- double numx = 1;
- double numy = 4;
- double xshift = .95;
- double yshift = 1.45;
- double zshift = .1;
- while(objectexists(followingObj)){
- double x = xshift+followingObj.size.x*((followingObj.rank-1)%numx);
- double y = -yshift+yloc(node(">visual/drawsurrogate/Lift/Slide", current))+followingObj.size.y*(Math.floor(((followingObj.rank-1)/numx)%numy) - (numy-1)/2);
- double z = zshift+followingObj.size.z*Math.floor((followingObj.rank-1)/numx/numy);
- double xFactor = 0.5;
- double yFactor = 0.5;
- double zFactor = 0;
- setloc(followingObj, x, y, z, xFactor, yFactor, zFactor);
- followingObj = next(followingObj);
- }
Some things to keep in mind:
Each TE is completely customizable by the user so the offset I considered to look right may not look right to you, the good thing is it's very changeable!


