question

Abhay Bajpai avatar image
0 Likes"
Abhay Bajpai asked Abhay Bajpai commented

Changing flow item appearance

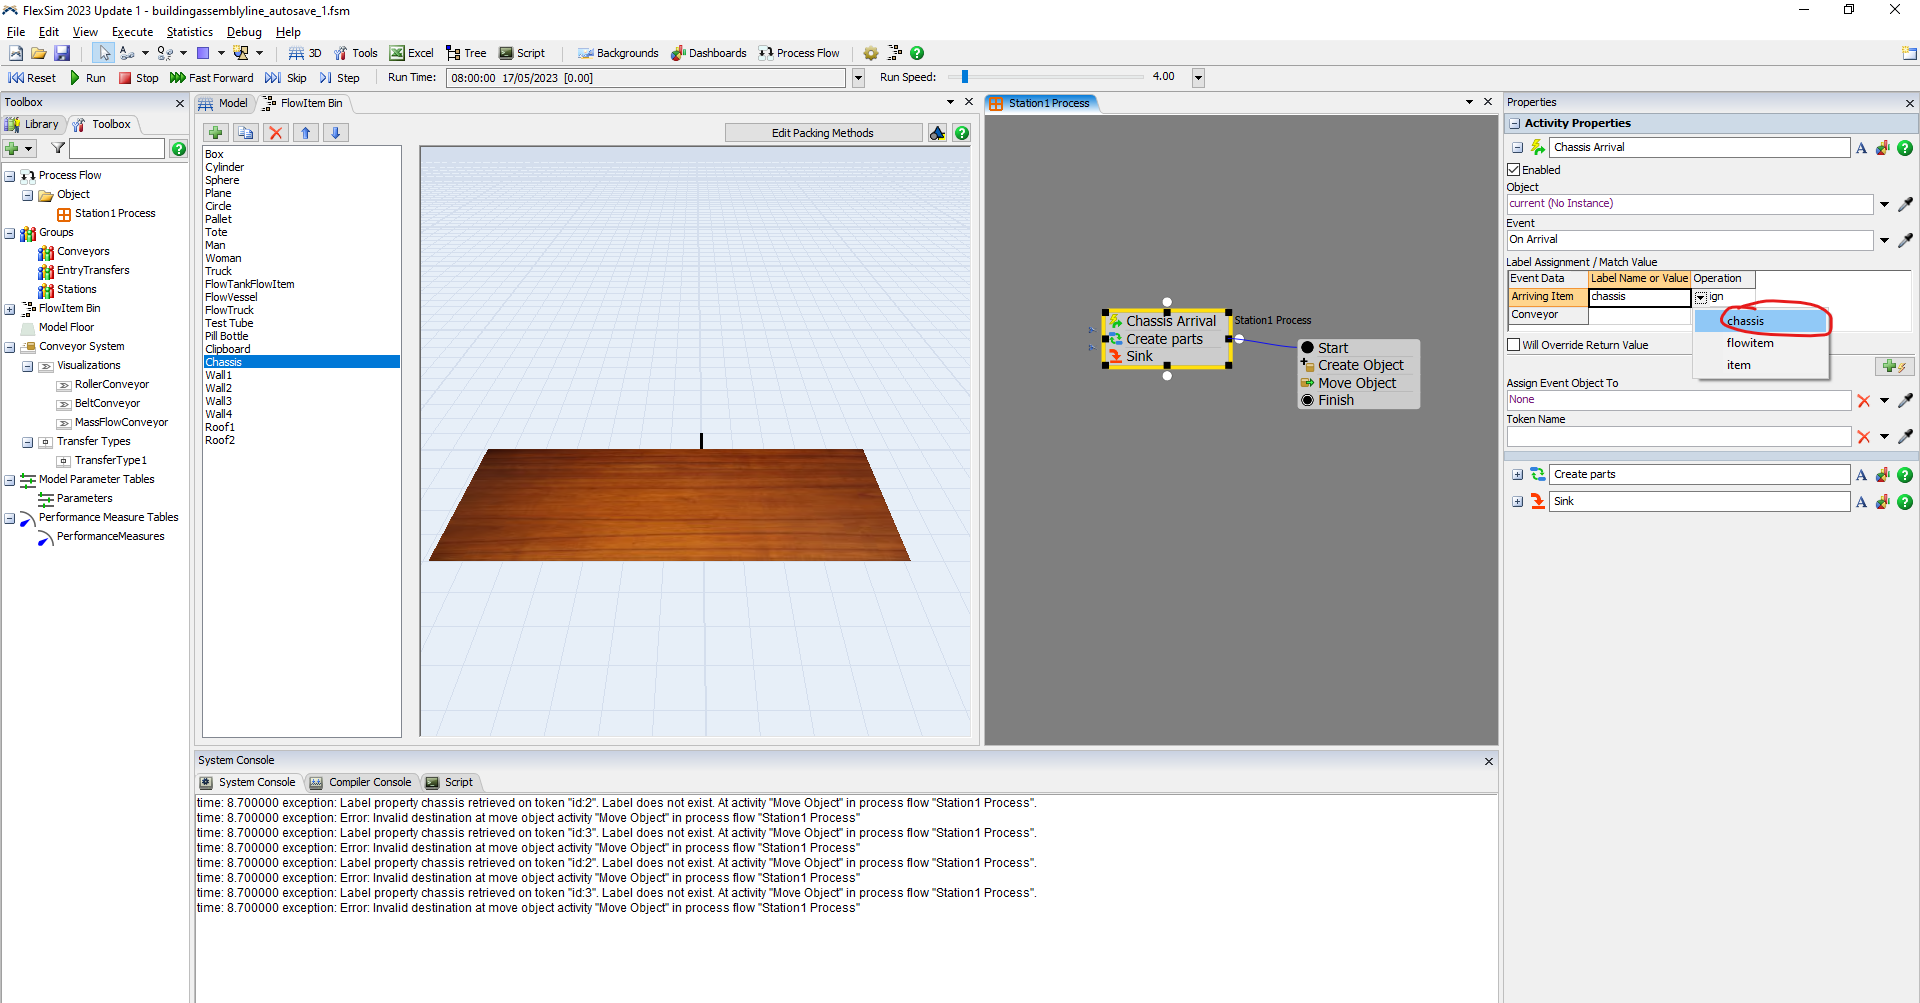
We are in a house construction industry and obviously we manufacture houses. I imported the 3-D object shown below. It is a floor chasis that goes under the floor and made that chasis as the new Flow Item (picture shown below). The assembly process is to add things on top of this chasis (shown in Picture 2).

Now, the next step is to change the animation as this object called "Floor" goes down the assembly line. On the website ( https://docs.flexsim.com/en/23.0/Using3DObjects/CreatingCustomObjectsAnimations/CreatingCustomFlowItems/CreatingCustomFlowItems.html) they mention that i have to have different Shape Frames in order to make it look different progressively.

The problem with that approach: If i have two facilities (2 different FlexSim models) : Facility 1 and Facility 2, tasks can happen at different places at those facilities. So, the flow item that may look like the one at Facility 1's S tation 2 may look different at Facility 2's Station 2 because tasks are spread differently at those two facilities.
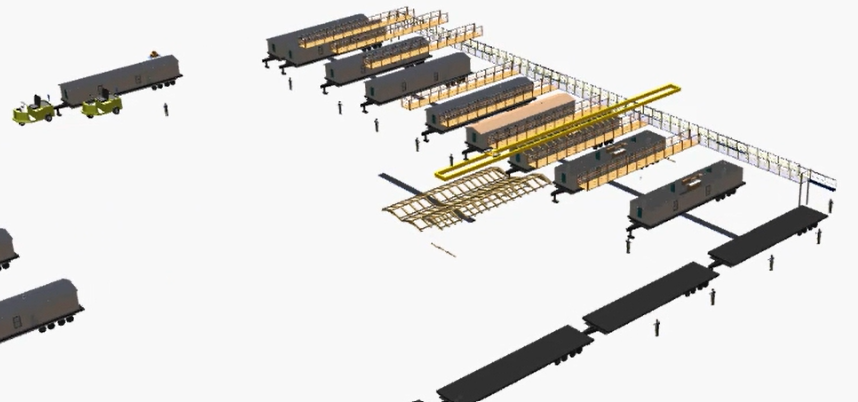
Picture 1

picture-1.png

Picture 2

picture-2.png


Q1 Is there a way i can have one flow item progress down the assembly line and add parts to it only if the task is performed at a station?

Q2. How do I achieve making multiple copies of the same model and just change where the tasks happen which triggers where and how the flow item should look like?

FlexSim 23.1.1
flow item visual
picture-1.png (173.3 KiB)
picture-2.png (238.5 KiB)
5 |100000

Up to 12 attachments (including images) can be used with a maximum of 23.8 MiB each and 47.7 MiB total.

1 Answer

·
Jason Lightfoot avatar image
3 Likes"
Jason Lightfoot answered Abhay Bajpai commented

I would create a Map of part locations and orientations (keyed on part number) and store it on the chassis flowitem, referring to it in a packing method when a part enters the chassis in order to set the position.

At each station have a list of parts that get added there and just move them to the chassis, which will invoke the packing method.

Use a container flowitem for the chassis.

· 7
5 |100000

Up to 12 attachments (including images) can be used with a maximum of 23.8 MiB each and 47.7 MiB total.

Abhay Bajpai avatar image Abhay Bajpai commented ·

Jason, that is a really smart idea! I did not know we could orient parts on top of chassis flow item. I understand what you want to achieve. I have follow up questions:

1. How do i create a map of parts that go on top of chassis flow items? and how do i tell it to go exactly where they should be on the chassis?


2. For Facility 1, if Part A goes on chassis flow item at Station 2 but for Facility 2, the same Part A may go on chassis flow item at Station 4. How do i make these changes?


3. Can i assign operators to a specific part's installation? For example, if i have 5 parts to be installed, each performed by 1 operator each, Can i assign time and operator to install those parts at the chassis flow item? If yes, how?

0 Likes 0 ·
Jason Lightfoot avatar image Jason Lightfoot ♦ Abhay Bajpai commented ·

To set this up I would create a small model that just places the items (anywhere) on the chassis ready for you to place manually, and then once they're in position run a one-time script to create the Map on the flowItem master - such as:

Object chassisFI=Model.find("/Tools/FlowItemBin/Chassis/1");
Map partMap;
Array orientedParts=so().subnodes.toArray();   //array of parts in the chassis instance that you've arranged
while (orientedParts.length){
    Object part=orientedParts.pop();
    partMap[part.partID]=[part.location,part.rotation];  // an array of two Vec3s
}
chassisFI.partMap=partMap.clone();   //write the map to the flowitem bin chassis

where you set the chassis with the pre-arranged parts as so() via the right click option.

Then the chassis packing method is just:

/**Chassis Packing Method*/
Map partMap=current.partMap;
item.location=partMap[item.partID][1];
item.rotation=partMap[item.partID][2];

You can just use an array on each station with the list of parts to add.

1684330431933.png

Example model attached with an object process flow for the stations.

buildingAssemblyLine.fsm

1684330026332.png


Note that you can just copy/paste a new station, edit the array of parts and I will just work. The station can be a processor - doesn't need to be a 'station' decision point on a conveyor.

1 Like 1 ·
1684330026332.png (253.0 KiB)
Abhay Bajpai avatar image Abhay Bajpai commented ·

@Jason Lightfoot I think i understood what you want me to do. Now, how do i achieve something like this if i have different models? Say i have 10 different models in total, and each model obviously have different Wall, Roof, and floor objects going on it.

1684959244731.png

Link to my other question about Cycle Time for each model You are helping me with the other question i had and i am posting the question in the link below.

0 Likes 0 ·
1684959244731.png (23.7 KiB)
Jason Lightfoot avatar image Jason Lightfoot ♦ Abhay Bajpai commented ·
Answer in the other post.
1 Like 1 ·
Abhay Bajpai avatar image Abhay Bajpai commented ·

Hi Jason,


Since names in FlexSim are case sensitive, Q1) how did you manage to have "chassis" with a lower case c where as the flowbin says "Chassis"? Q2) What is the role of "Label Assignment/Match Value" do in Event-based Source? because when i changed the Label Name to flowitem, the following parts i.e. Wall1, Wall2, etc did not know which object to adhere to. I am trying to understand why that happened.


1685990516131.png

0 Likes 0 ·
1685990516131.png (239.6 KiB)
Jason Lightfoot avatar image Jason Lightfoot ♦ Abhay Bajpai commented ·

That label could also be 'item' or anything really -it just means the item arriving at the station. But of course anything looking for a label on the token has to have the correct label name so it's important that whatever you choose you use that throughout the process flow

1 Like 1 ·
Abhay Bajpai avatar image Abhay Bajpai Jason Lightfoot ♦ commented ·
That made sense. Its just a label that you're slapping on the arriving chassis flow item! Thanks a lot!
0 Likes 0 ·

Write an Answer

Hint: Notify or tag a user in this post by typing @username.

Up to 12 attachments (including images) can be used with a maximum of 23.8 MiB each and 47.7 MiB total.