question

Ralpho S avatar image
0 Likes"
Ralpho S asked Ralpho S commented

How to organize flowitems inside a container using the combiner fixed resource?

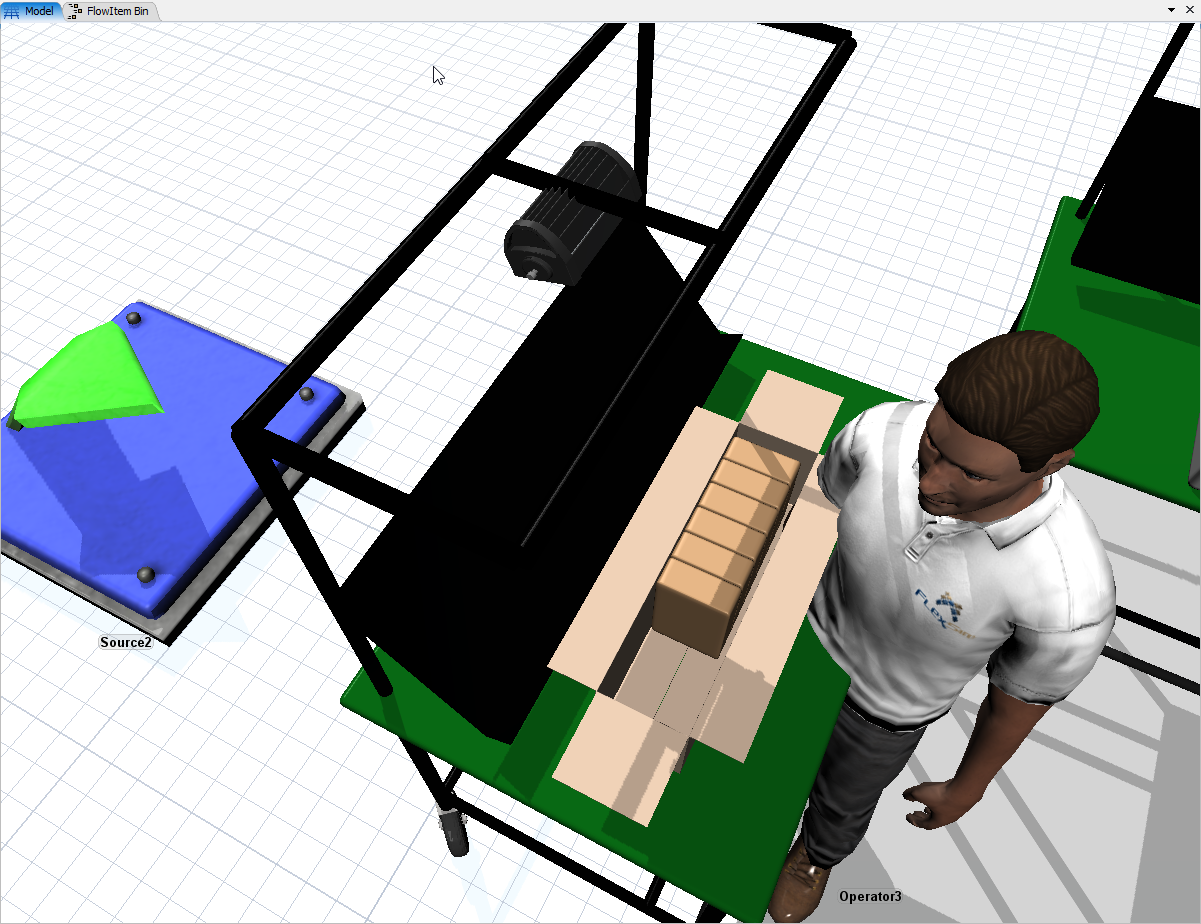
On the Attached model, I am trying to place 10 boxes inside a MasterBox. Basically, the first 3 stages assemble the boxes and the fourth (combiner) should arrange the 10 boxes inside the master Box.

When i watch the simulation run, the boxes appear around the master box with GAPS, and I cant control their exact position. basic-moonshine.fsmI would like to place them on 2 rolls of 5 boxes, with no GAP between them, filling the master box.

Tried to customize the packing method.. and also change flowitem position by using subnodes trigger commands, but I couldnt place the boxes inside the master box as intended.

Can anyone please help me solve this issue? need learn how to control flow item positions.

Appreciate it.

flowitempositioncontainer
5 |100000

Up to 12 attachments (including images) can be used with a maximum of 23.8 MiB each and 47.7 MiB total.

Pedro Ortelani avatar image
2 Likes"
Pedro Ortelani answered Ralpho S commented

Hello,

The problem I found in your model is that you rotate the box at the onExit trigger of the combiner "BE03", and that messed up the packing method functionality.

The packing method, uses x axis, y axis and z axis information to position the flowitem, when you rotate the flowitem those values continue the same because the position of the flowitem is determined by the perspective of the container, so you just add the rotation value to the spatial childnodes.

I fixed it by rotating the box on the FlowItem Bin, removing the onExit trigger from the "BE03" combiner, and I made an adjustment on the Simple Packing Method (the one you are using on Master Box) to consider the right zsize for the positioning.

I also made the MasterBox a little bigger so it would fit the boxes.

I hope that helps!

25995-basic-moonshine-fixed.fsm


· 1
5 |100000

Up to 12 attachments (including images) can be used with a maximum of 23.8 MiB each and 47.7 MiB total.

Ralpho S avatar image Ralpho S commented ·

wow, now everything make sense! hahaha.

Perfect solution man, problem solved!! thank you very much!!!

1 Like 1 ·
Andy B avatar image
2 Likes"
Andy B answered Ralpho S edited

Hi,

Your Master Box is sized to include the flaps - the yellow box that appears when you click on the Master Box is the size that the packing algorithm knows about - so the packing code is looking at a bigger area than you intend.

Easiest solution is to change the box size in the Master Box, General tab in the FlowItemBin to make the box size just the size of the internal box area. The packing algo will then get the item locations correct without any adjustment, but the box is now drawn at the wrong size. Use the Shape Factors, Edit function in the Master Box, General tab in the flow item bin to expand the drawn image so that the flaps are drawn outside of the yellow box.

· 1
5 |100000

Up to 12 attachments (including images) can be used with a maximum of 23.8 MiB each and 47.7 MiB total.

Ralpho S avatar image Ralpho S commented ·

basic-moonshine.fsmHello! Thank you very much for your help, appreciate it.

I've adjusted the size of the master box, but still, the packing algo is placing the boxes in 2 colunms instead of a straight line.

I messed up with the master box packing algo from the toolbox, might have done somenthing wrong. Switched back to the simple packing algo now.. but its not working.

0 Likes 0 ·

Write an Answer

Hint: Notify or tag a user in this post by typing @username.

Up to 12 attachments (including images) can be used with a maximum of 23.8 MiB each and 47.7 MiB total.