question

Bach avatar image
0 Likes"
Bach asked Bach commented

Changing standard snapping surface of Joint6 on Robot

Dear Community,

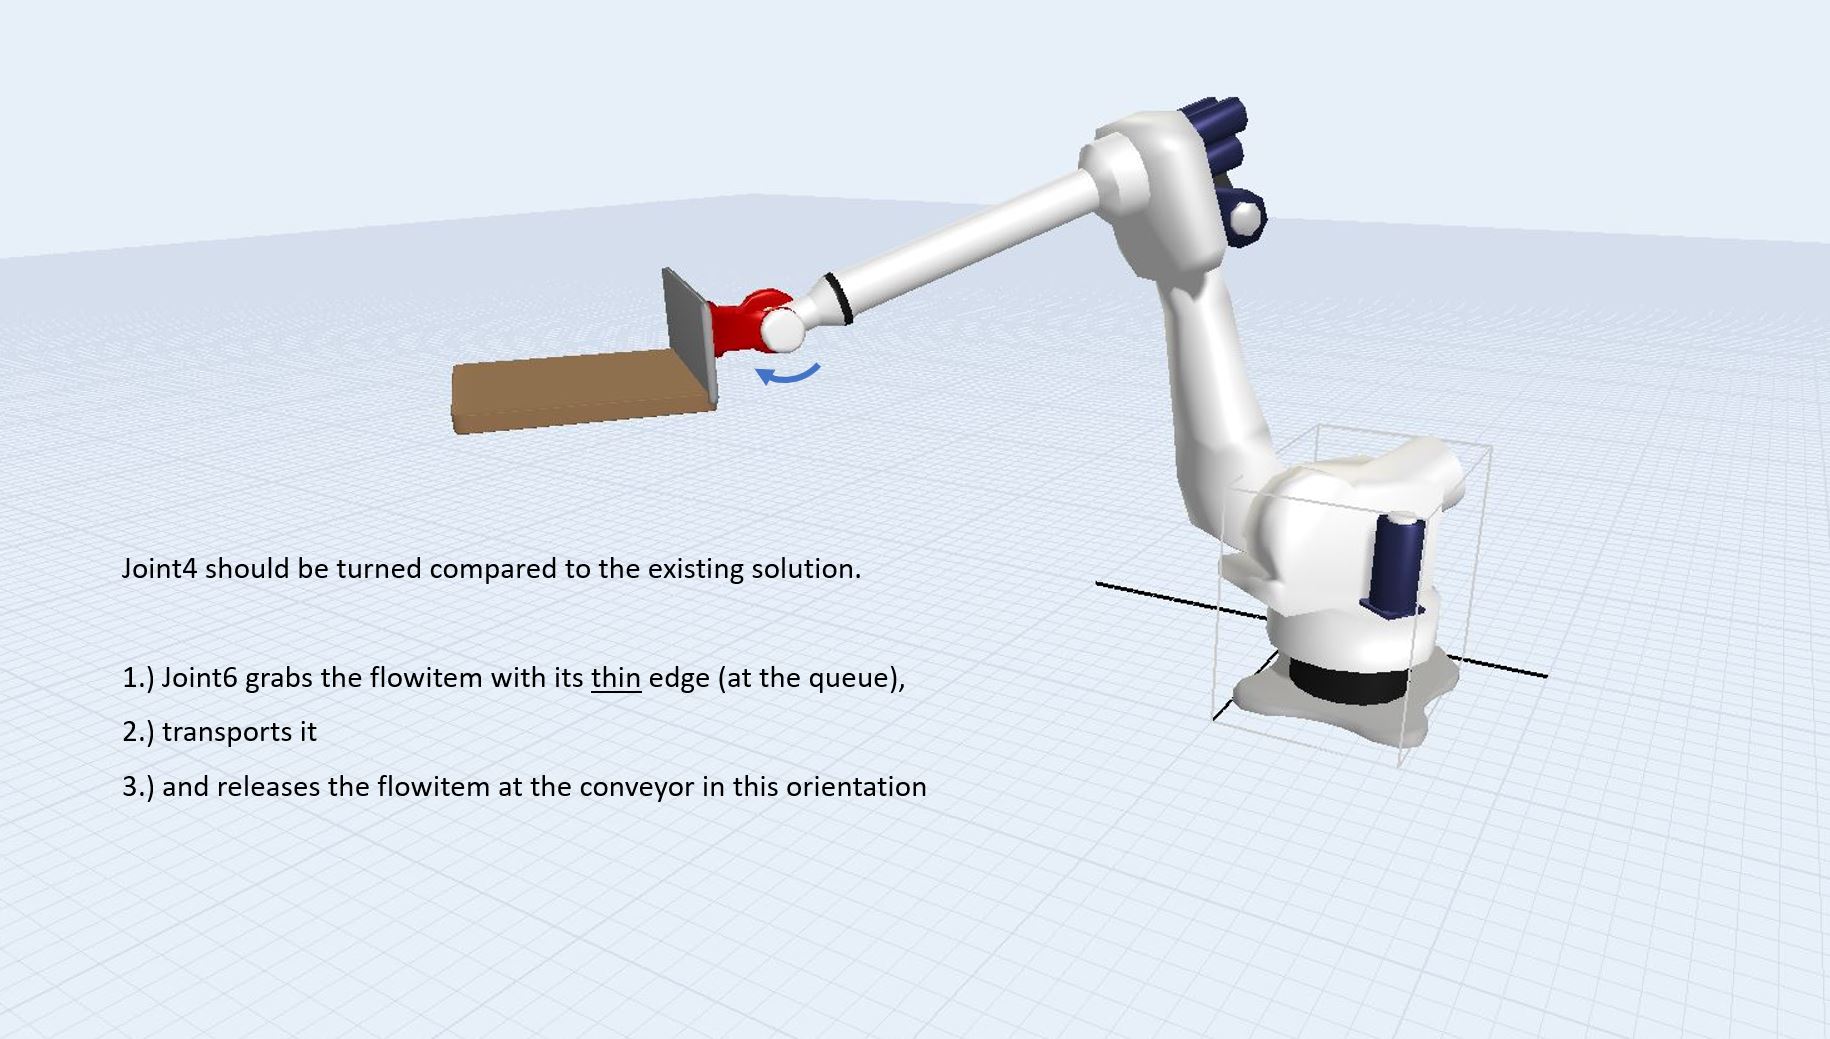
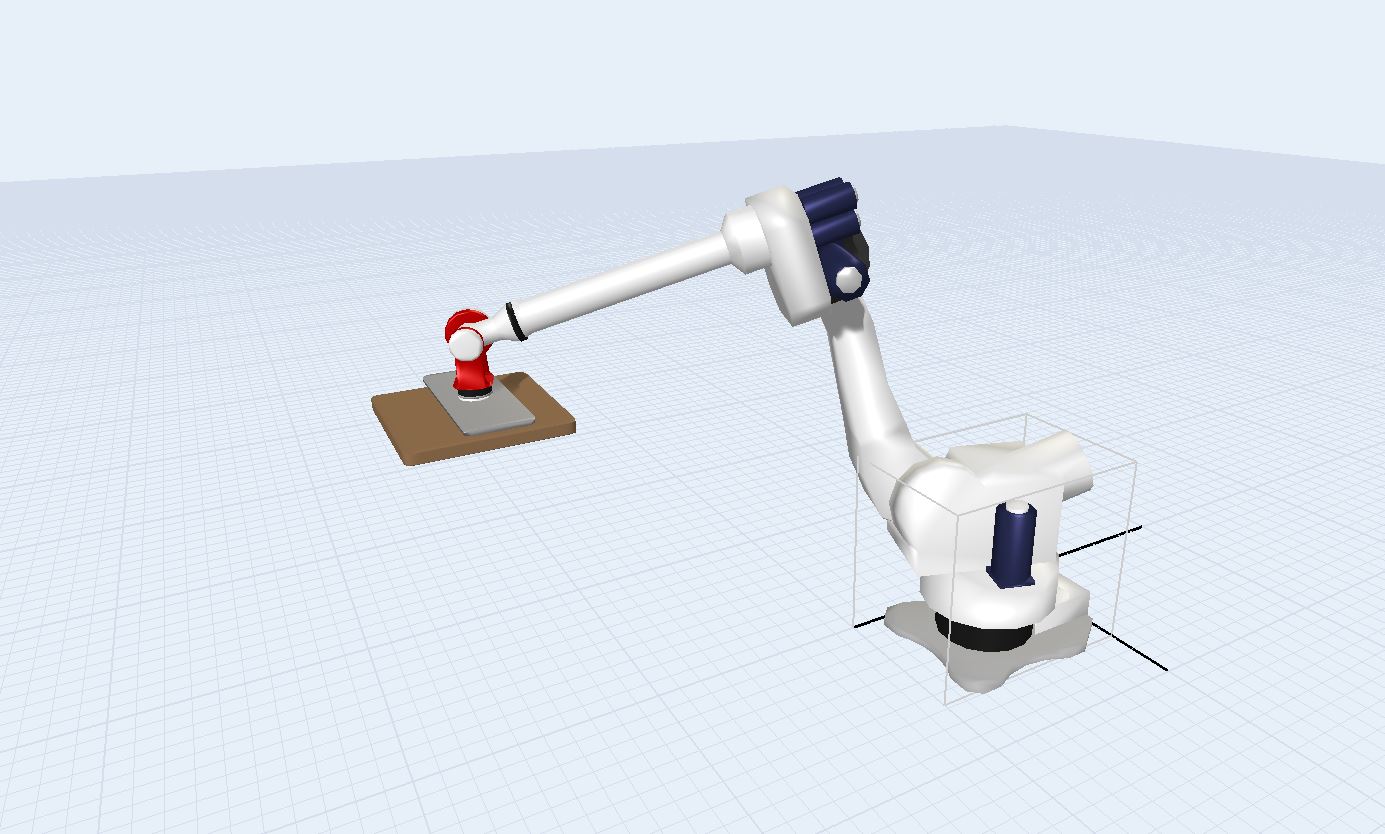
I would like to change the “snapping surface” of Joint6 on the standard robot. The goal is that flowitems are grabbed and hold with the thin edge of Joint6 instead of the flat surface as default. See the pictures attached.

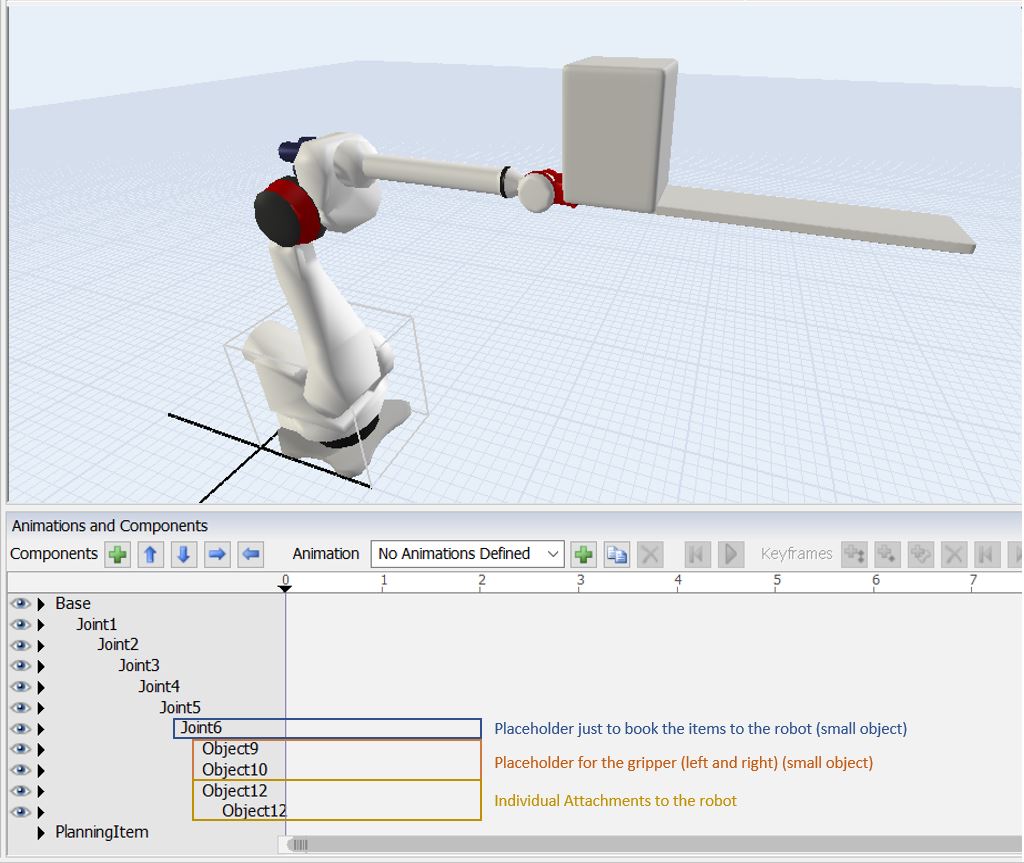
Once I can do this, I can edit or change the Joint6 3D-shape (e.g. to a fork or a vacuum manipulator).

  1. Is there a easy way to change the “snapping surface” in the robot and simply turn Joint4?
  2. Is it necessary to rotate every single 3D-shape of the default robot Joints in AC3D (x rotation 90 degrees)?
  3. Or should I develop a process flow “Change Visual” for the flowitem (as soon as it snapped to the robot the flowitem rotates and positions. As soon as the flowitem is released by the robot the flowitem must be rotated back in the original position?

I tried multiple ways but didn’t figure out a workable solution yet.

What is the easiest way in FlexSim 2018?

Thank you, Markus

Robot.fsm

Current_Normal_Orientation.JPGtargetorientation.jpg

FlexSim 18.2.3
robot pickingrobot armjoint6
5 |100000

Up to 12 attachments (including images) can be used with a maximum of 23.8 MiB each and 47.7 MiB total.

1 Answer

·
Eric M avatar image
2 Likes"
Eric M answered Bach commented

Hi @Bach, here's an example where I used Robot Motion Paths to change the orientation of the joints when loading and unloading. I changed the "Clamp Orientation" to change how the flowitem is picked up. I'm not sure if this does the exact motion you are after, but hopefully it provides an example of how you can go about it.

robot motion path.fsm


robot-motion-path.fsm (211.0 KiB)
· 1
5 |100000

Up to 12 attachments (including images) can be used with a maximum of 23.8 MiB each and 47.7 MiB total.

Bach avatar image Bach commented ·

Hi @Eric M, and thanks! That is a perfect solution that I realized as well after long tryout and error. Basically I shrinked Joint6 to a placeholder where the items are able to be "hooked on". I attached 2 small objects as placeholder for the grippers. Using further levels in the tree are perfect for attaching individual objects and shapes. Changing the clamp orientation in the Properties of the robot afterwards works good. Unfortunately chaning the Clamp Orientation is only possible in the "Define Motion Path" Mode. It wont work in the other modes e.g. "Use Simple Motion Method".robot-structure.jpg


Robo Test.fsm

0 Likes 0 ·
robot-structure.jpg (113.5 KiB)
robo-test.fsm (61.0 KiB)

Write an Answer

Hint: Notify or tag a user in this post by typing @username.

Up to 12 attachments (including images) can be used with a maximum of 23.8 MiB each and 47.7 MiB total.