We want to capture video using FlexSim's Video Recorder. Do you have any tips or tricks that will help us capture the best video possible? Can you walk us through the process?
question
Best practices for capturing video in FlexSim
1 Answer
The following is a set of steps to capture video in FlexSim. Steps 1-4 help maximize the video quality, but they are largely optional. For best quality, it's worth ensuring that your computer at least meets FlexSim's minimum requirements and preferably the recommended (see system requirements). You'll also want to make sure you have the latest graphics driver installed for your GPU.
1) open FlexSim and open your model file.
2) go to FlexSim's main menu, File > Global Preferences, Graphics tab. Change graphics settings such that you're happy with the look of your model (shadows, quality, etc). If your computer is not using graphics acceleration, you really need to either update your graphics drivers or use a different computer that meets FlexSim's system requirements. Please see this article for more on maximizing your graphics compatibility and performance.
3) apply and close out of your Global Prefs. Close FlexSim to save off your new graphics settings.
4) go into your graphics control panel (Nvidia or AMD) and turn anisotropic filtering and antialiasing all the way up. This, along with the settings from step 2, will help make your captured FlexSim footage look the best.
5) open FlexSim and open your model file.
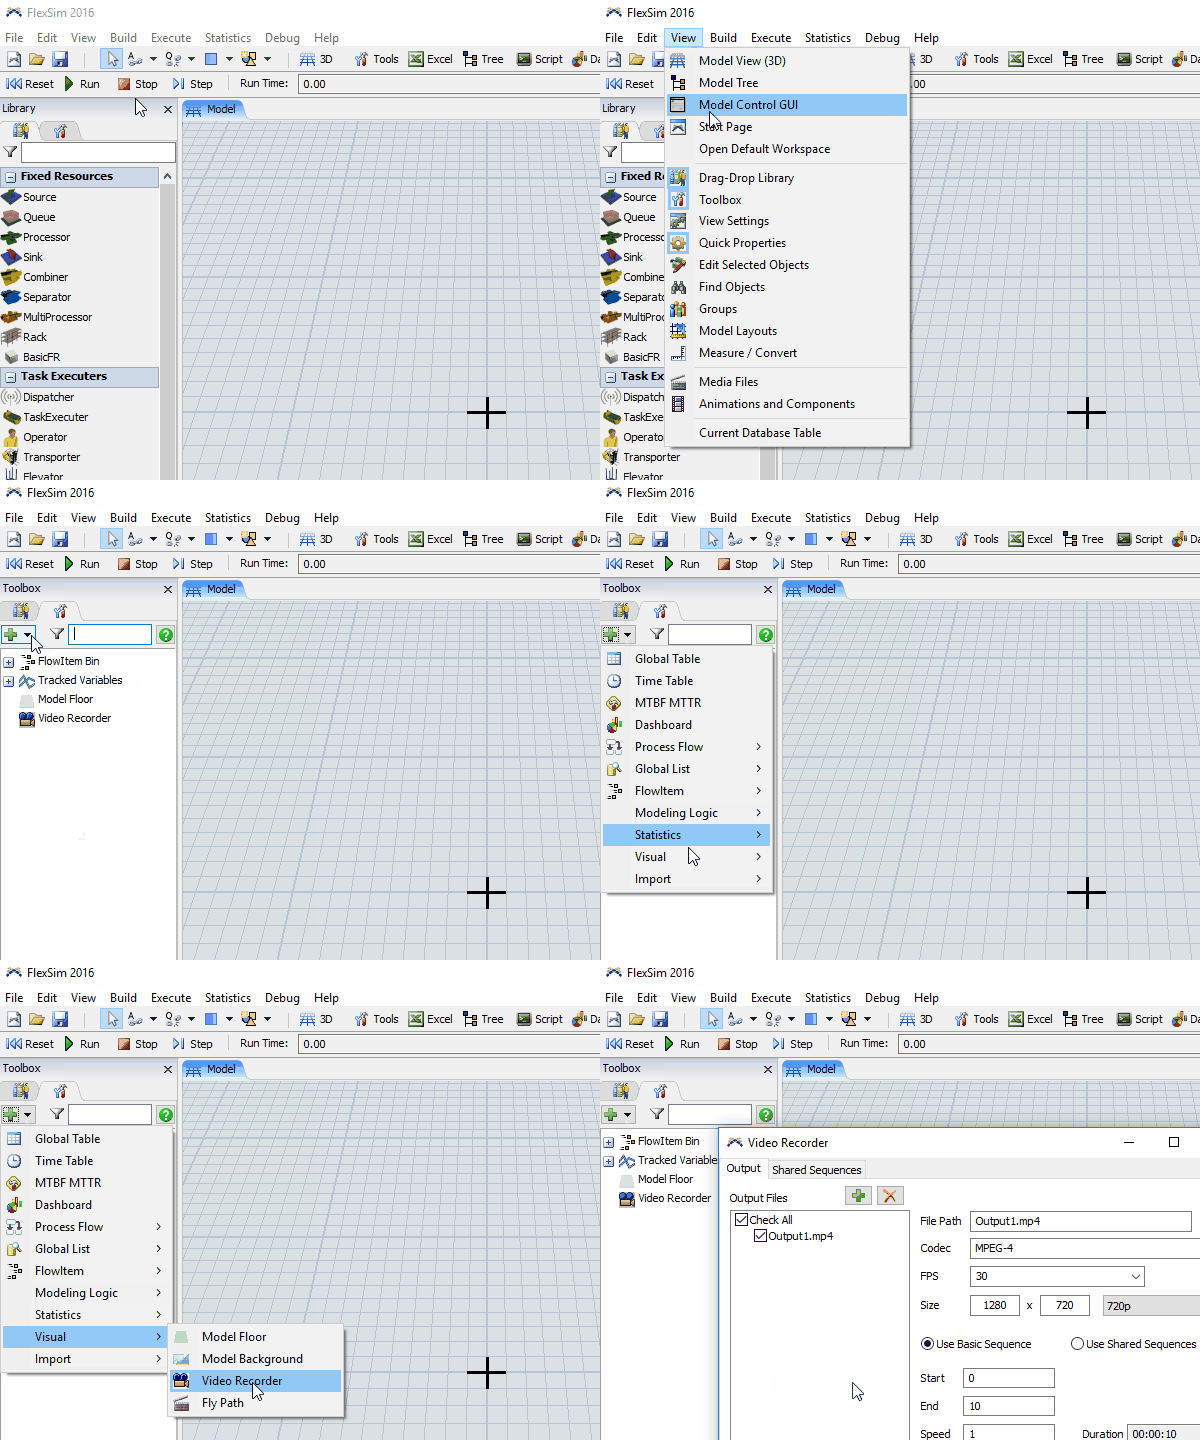
6) From FlexSim's main menu, open the Toolbox (View > Toolbox), then hit the green plus (+) button, go to Visual and choose Video Recorder.
7) name the file (make sure that ".mp4" remains part of the file name). The default save location is the same directory as the open model file.
8) choose a video size (we recommend 1080p, but you may have other needs).
9) specify the model time to start and end the video capture, and how fast you want the model to be running in the captured video. Setting all these tells you how long the video duration will be.
10) for the View option, select the sample icon and click on the view you want to capture. Make sure the camera angle of the view is how you want to capture the model.
11) for the View option, untoggle the eye icon to disable the preview during recording. This speeds up the capture process.
12) if you have made a flypath to define camera movements, you can specify to run that flypath for the capture.
13) hit the record button.
14) do not minimize FlexSim. Do not Interact with FlexSim's interface in any way while the capture is ongoing. Its okay to bring up another program and have it on top of FlexSim, but leave FlexSim up and maximized and don't press any of its buttons.
15) during recording, a separate Windows command window will have opened. Leave it alone. While that command window is alive, you know the capture is ongoing. When the command window disappears from your taskbar, that is how you know recording is complete. This is handy since you'll likely be doing other things on your computer and you'll be able to tell with a glance at the taskbar whether FlexSim is still capturing video or if it has completed.
question details
4 People are following this question.

