question

Antonio GA2 avatar image
0 Likes"
Antonio GA2 asked Joshua S edited

How do I use the emulation tool? (one example)

Hi, I'm going first in this Flexsim, I could share an example or tutorial of using the tool "emulation"

Choose One
emulationdevelopmentemulation moduleexample modelideas
· 2
5 |100000

Up to 12 attachments (including images) can be used with a maximum of 23.8 MiB each and 47.7 MiB total.

Joshua S avatar image Joshua S commented ·

Are you working with a PLC?

0 Likes 0 ·
Antonio GA2 avatar image Antonio GA2 Joshua S commented ·

Not yet, first we simulate it with modbus tools, then figuring in the practice

0 Likes 0 ·

1 Answer

·
Joshua S avatar image
5 Likes"
Joshua S answered Joshua S commented

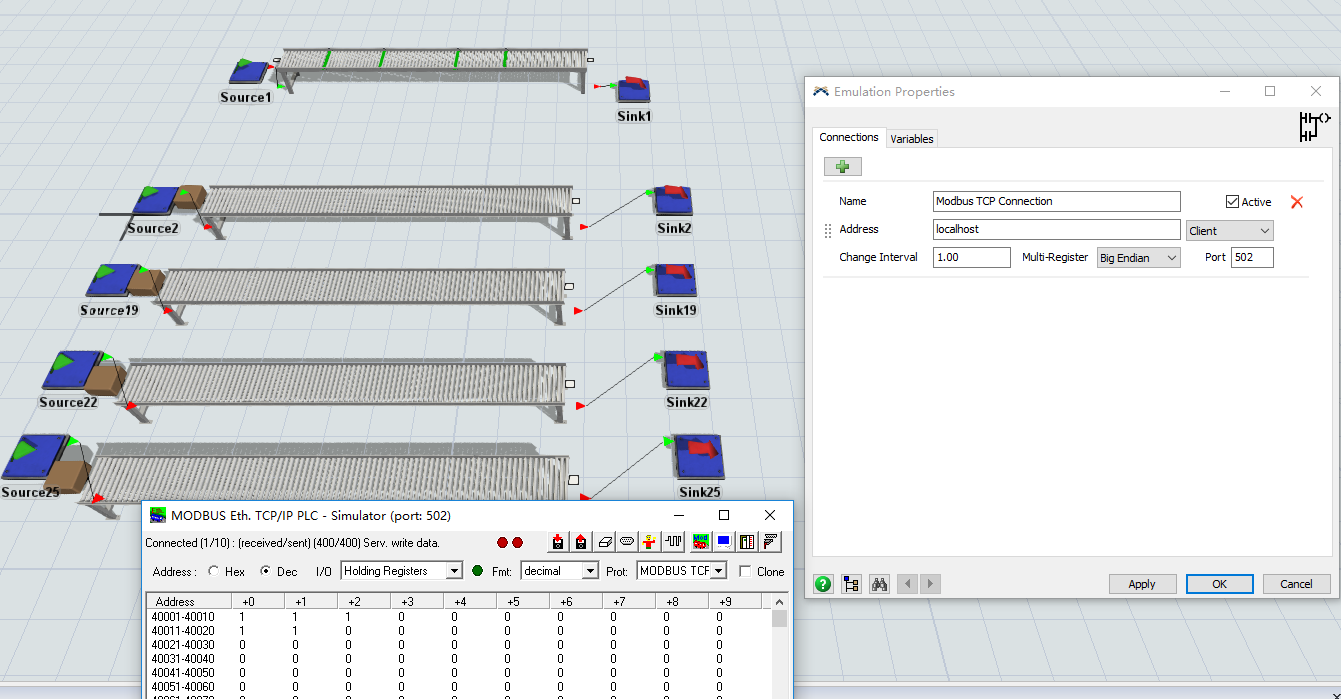
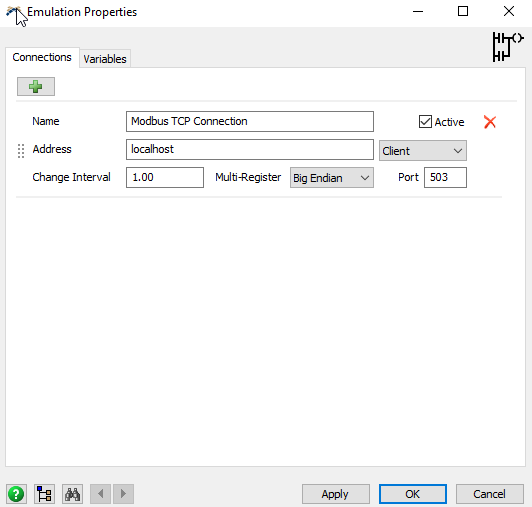
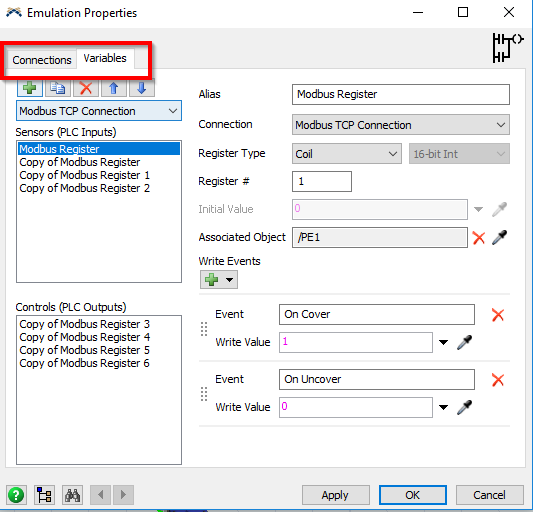
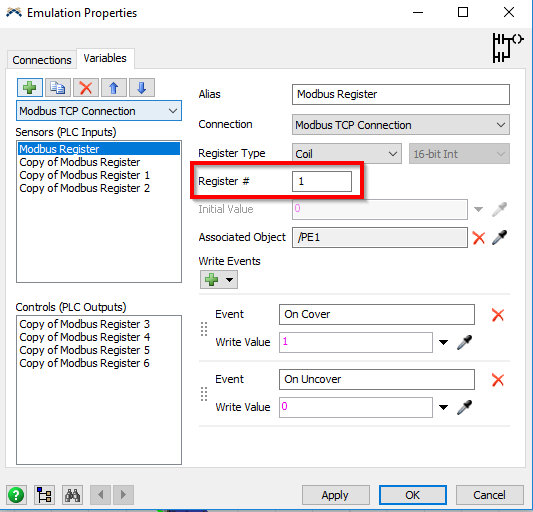
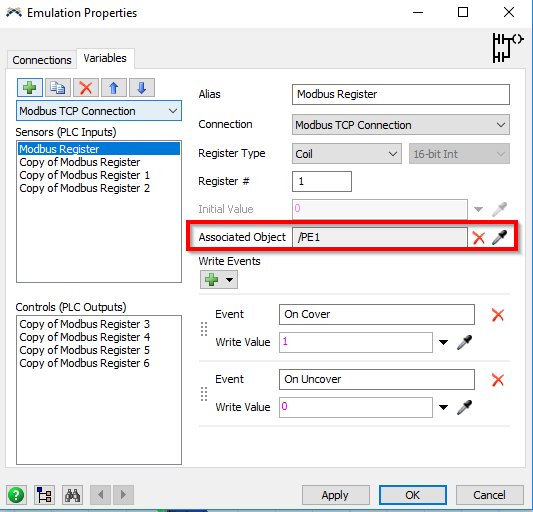
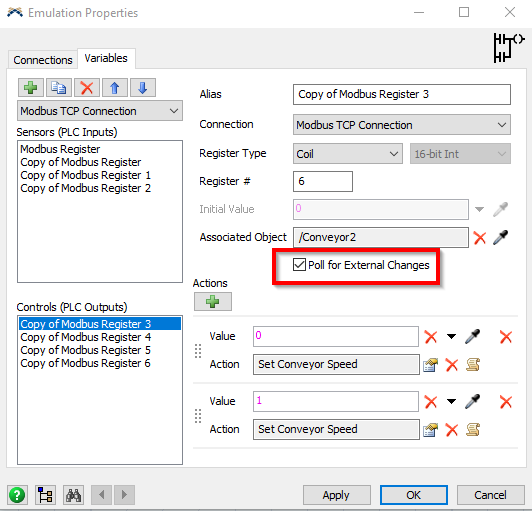
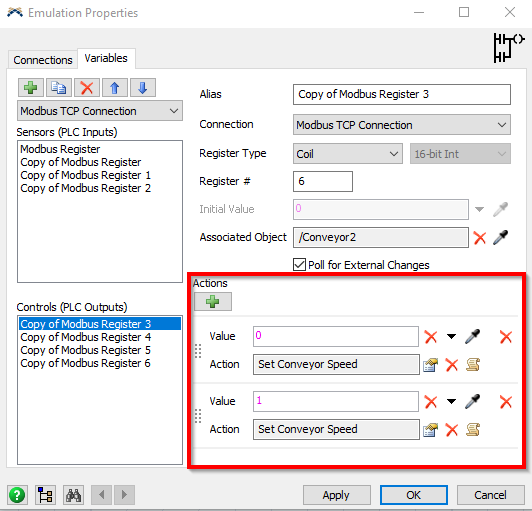
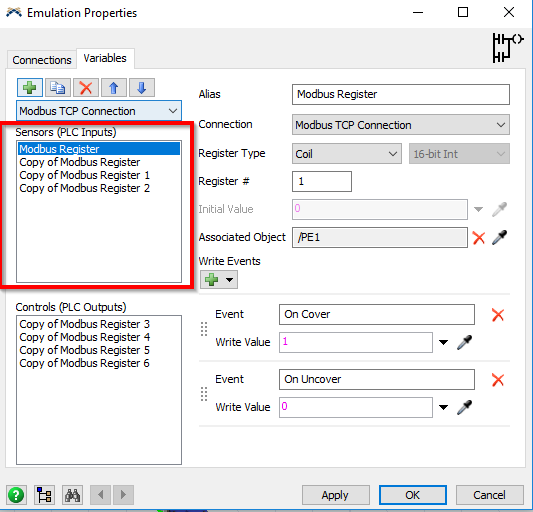
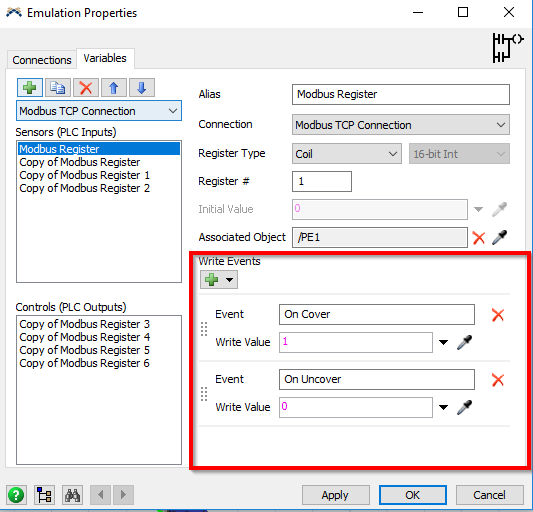
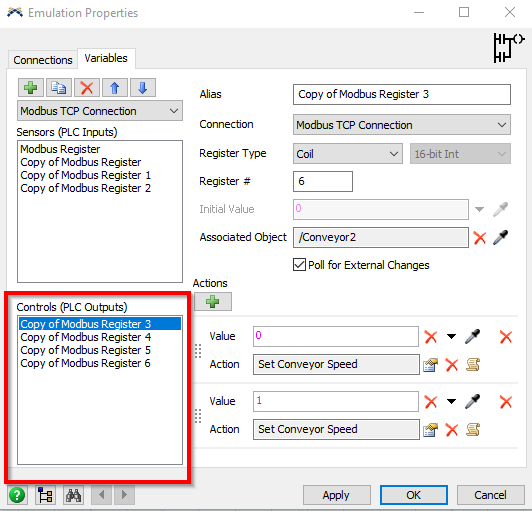
Here's a folder with a FlexSim model example and a program I've used to simulate a MODBUS data. Let me know if this is helpful or changes that can be made to make it more useful.emulation-example.zip


emulation-example.zip (667.8 KiB)
· 9
5 |100000

Up to 12 attachments (including images) can be used with a maximum of 23.8 MiB each and 47.7 MiB total.

Antonio GA2 avatar image Antonio GA2 commented ·

thank you very much, it was a great help

1 Like 1 ·
jing.c avatar image jing.c commented ·

Hi @Joshua S

Thanks for your example, but I can not understand how it works. Could you give me more hints about how it works?(pic attachment will be appreciated)

0 Likes 0 ·
shot.png (275.7 KiB)
Joshua S avatar image Joshua S jing.c commented ·

First off, is it running for you?

If you are having bigger issues with the Emulation tool, contact @Matt Long, he's the developer of this.

Here's a list of different parts to the Emulation tool

There isn't a lot to change in this part except the "Address" which in this case is localhost because we are using a PLC simulation software, but if you connected it with a real PLC, you would chagne that to the IP address of your PLC. PLCs usually use port 502

The Variables tab is where change the settings for your read/write to the PLC or simulation program

This is the Write section where you add events that on triggering it changes values on the PLC

This selects which register you are going to write to

This points to which object you want to read events from. In the case of the example I gave you these are reading the Photo Eyes

Here you decide what you will write to the registers

This part is the Read section, You control what happens in FlexSim based of outputs from the PLC.

Just like with inputs to the PLC, you select which registers you want to read from, and make sure the"Poll for External Changes" is selected so it will always be reading from the PLC.

This area is where you decide what will happen from the outputs you are reading from the PLC.

Hope this is useful!

1 Like 1 ·
pic1.png (28.2 KiB)
pic5.png (28.1 KiB)
pic2.png (27.9 KiB)
pic3.png (27.8 KiB)
pic4.png (28.0 KiB)
pic6.png (31.1 KiB)
pic7.png (30.9 KiB)
pic8.png (31.5 KiB)
pic9.png (12.7 KiB)
jing.c avatar image jing.c Joshua S commented ·

Thanks a lot. There is one more problem I have not solved.

I had got the change in MODBUS, but I can not control the speed of the conveyor which make the item flow(sorry for my lack of knowledge about PLCs)

Could you give me more detail about settings?

0 Likes 0 ·
control.gif (353.3 KiB)
Show more comments

Write an Answer

Hint: Notify or tag a user in this post by typing @username.

Up to 12 attachments (including images) can be used with a maximum of 23.8 MiB each and 47.7 MiB total.