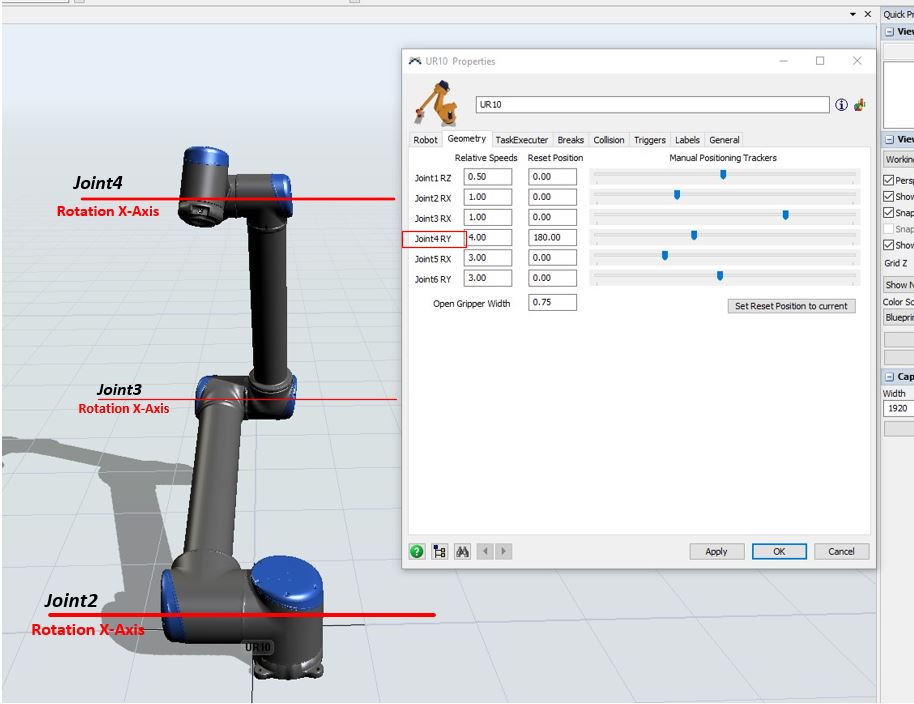
How do I change the axis of rotation of a robot joint? If the joint is currently rotating about its X axis, how do I make it so it rotates about its Y axis?
You need to follow the directions in the video carefully if you want the movements to work correctly: Animation Creator, Part 4: Customizing the Robot
Particularly, times 1:30 - 2:16 explain that you need to make sure that the rotations of each joint are correct in the 3D modeling software before you import the shape into FlexSim.
If you mess with the rotations of the objects in the Animator in order to position them correctly, then the robot's movement code that determines how to rotate each joint isn't going to work correctly.
Here's a video showing a similar kind of robot when configured correctly: https://cloud.flexsim.com/index.php/s/CzDn8fGcHYqQsZj
hello,
can you please share with me the robot show in the video?
it would be of great help...
@anthony.johnson made the Animation Creator video. He may be able to share the robot in that video.
The second video was a robot configured for a client using their shapes. I can't share the shapes, just a video of the result. @Patrick Zweekhorst might be able to share it.
thank you!!! @anthony.johnson do you thibnk you can share it with me?
I'm trying to model the universal robots UR10 in FlexSim as well, and what i am running into is that it appears the "standard" TE Robot joint 4 rotates around Y, but the Universal Robots Joint 4 rotates around X. Maybe it would be useful to be able to change the axis of rotation for each joint in the "geometry" tab.
Hi @Maston Lyons,
To ensure that this post is seen and reviewed as a suggestion, I would post an idea with a link to this question.
For this type of robot, you could use motion paths that all keep Joint4's rotation at a constant value. That way, the motions only use 4 joints: 1, 2, 3, and 5.
You can use the Geometry tab to adjust the robot's position for entering the values in the Path Positions table instead of using the Planner Item that uses inverse kinematics that assume it can rotate joint 4 on the Y axis.
question details
11 People are following this question.

