question

Lorenz N avatar image
0 Likes"
Lorenz N asked Matthew Gillespie commented

Multiple Waiting Lines and Max Capacity of Waiting Lines

Wait_Line_Example.fsm

This question is a two/three parter concerning the Waiting Line objects in Flexsim 20 (HC Environment).

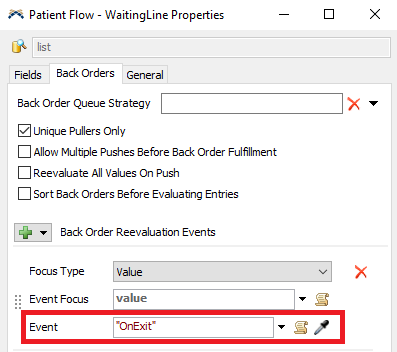
1) Can the Waiting Line object be set to have a Max Capacity and if so how?

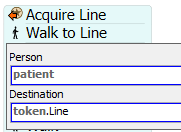
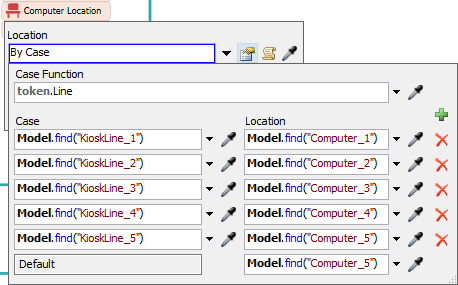
2) How do you assign or setup multiple Locations with their own specific Wait Line?

a) I am able to do so for staff By Case based on a Location. But Waiting Line is not a staff or location.

3) How do you make the patient choose the shortest line? Therefor the Computer Location they pick is based on the "census" of the Wait Lines.

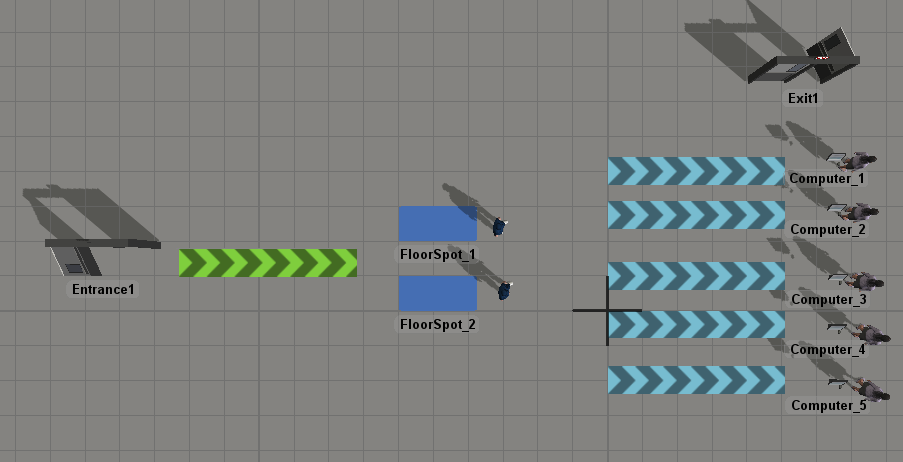
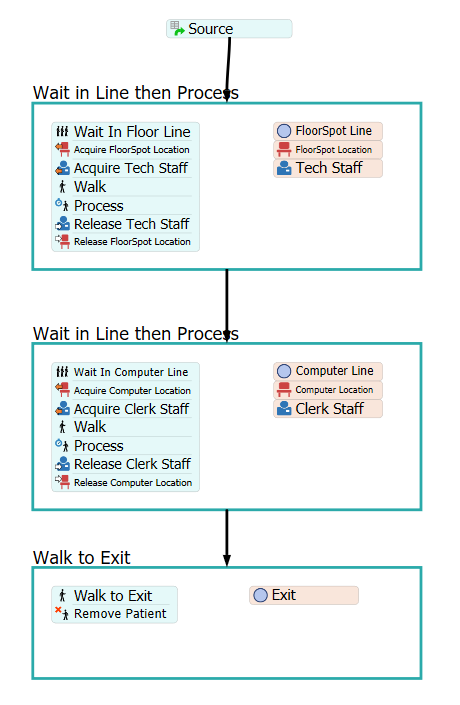
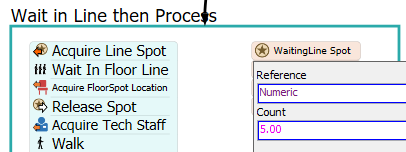
In the model we have a single entrance where the Patients arrive. The first process involves 2 floor spots(generic location) and their specifically assigned staff. The patient waits for this location in a single line with infinite holding space. After this process is complete, they will go to a computer location with a specifically assigned staff. They will pick a computer kiosk with the shortest line. However, each computer kiosk waiting line can only hold 5 people. Therefore if all 5 lines are full, they will have to wait at the first process basically. I hope this was understandable.

FlexSim 20.0.7
waiting lineflexsim 20.0.7maximum capacityhealthcare hcshortest line
1594338283611.png (69.2 KiB)
1594338316835.png (32.9 KiB)
wait-line-example.fsm (100.2 KiB)
5 |100000

Up to 12 attachments (including images) can be used with a maximum of 23.8 MiB each and 47.7 MiB total.

1 Answer

·
Matthew Gillespie avatar image
1 Like"
Matthew Gillespie answered Matthew Gillespie commented

I'm going to split this answer into two parts: Choosing the Shortest Line and Adding Max Capacity

Choosing the Shortest Line

ShortestLine.fsm

You could use code to figure out which line has the least number of people in it like I did in this answer, but a simpler and more elegant way to do this would be to use a Resource.

  1. Add a Resource block and call it Waiting Line.
  2. We'll then also need an Acquire Resource and Release Resource activity.
  3. You already added the five waiting lines to a group and now we're going to point the WaitingLine Resource at that group by clicking the down arrow button next to the Reference field > Group > KioskLine_Group.
  4. Click on the Advanced button (this pulls up the List that the Resource uses behind the scenes) and add a queueSize field by clicking the Add button > Fixed Resource > queueSize. Click OK to apply and close the window.
  5. In the Default Query click the down arrow > ORDER BY (sort) > queueSize (the ASC part is optional since an order by defaults to ascending if you don't specify)

To finish setting up the other activities make sure the Acquire activity is connected to the WaitingLine Resource and then store the acquired line on a label of some sort. Then refer to that label when you release the line and when sending the patient to the line:

Adding Max Capacity

WaitingLineCapacity.fsm

The main thing we have to add now is to add a statement to the Resource's query so we can only acquire a waiting line with less than five people in it. We'll add a WHERE statement to the start of the query that filters out lines that don't have a queueSize < 5.

Now we could stop here, but there are a couple edge cases that come up when all 5 lines are completely full and they're not too hard to fix.

First, this system works fine as long as there's an available line to acquire, but if all the lines are full when the patient tries to acquire one then they'll wait forever. We need to add a backorder reevaluation event to fix this. Open the WaitingLine Resource's properties and click the Advanced button. Then go to the Back Orders tab and add a Value Event from the add button in the Back Order Reevaluation Events section. Set the event to "OnExit". This will make the list reevaluate people waiting for a line whenever someone exits any of the lines.

Second, since you have two people waiting to get in line at a time then when a line opens up both people jump in the line and then there are 6 people in the line. To fix this I added a Walk activity in between the Acquire and Release activity - this way the line's content is updated by the first person before the 2nd person can acquire the line


1594409602249.png (12.4 KiB)
1594409784658.png (26.7 KiB)
1594411656583.png (21.3 KiB)
1594412014591.png (2.7 KiB)
1594412255102.png (4.3 KiB)
1594412446416.png (18.6 KiB)
shortestline.fsm (101.0 KiB)
· 2
5 |100000

Up to 12 attachments (including images) can be used with a maximum of 23.8 MiB each and 47.7 MiB total.

Lorenz N avatar image Lorenz N commented ·

@matthew.gillespie Thank you for your assistance. Everything is working as intended! Though I had to look deeper into the example model to find out how to setup the Location Resource. You might want to edit/add it to the instructions so that future people don't accidentally skip that step.

As an aside, does your steps for adding a waiting line capacity also work for a single line? Thanks again!

0 Likes 0 ·
Matthew Gillespie avatar image Matthew Gillespie ♦♦ Lorenz N commented ·

True. For determining which Computer to use I set up the Computer Location resource with a By Case pickoption and used the acquired Waiting Line stored on the token.Line label as the case.

If you're interested, this previous question goes over 2 other ways you can acquire a specific object based off some other object you're at or that you acquired.

Yes, this method would work for adding capacity to a single line, although there are easier ways to do it for a single line. For example, you could just set the Resource to be Numeric and set the count to the line's capacity. Then make people acquire one of these "spots" in the line before getting to go to the line.

Here's your model updated to do this with the first line so that it has a capacity of 5:

WaitingLineCapacity_2.fsm

0 Likes 0 ·

Write an Answer

Hint: Notify or tag a user in this post by typing @username.

Up to 12 attachments (including images) can be used with a maximum of 23.8 MiB each and 47.7 MiB total.