question

Marie Lisa avatar image
0 Likes"
Marie Lisa asked Marie Lisa commented

Item position on Combiner

Hello guys,

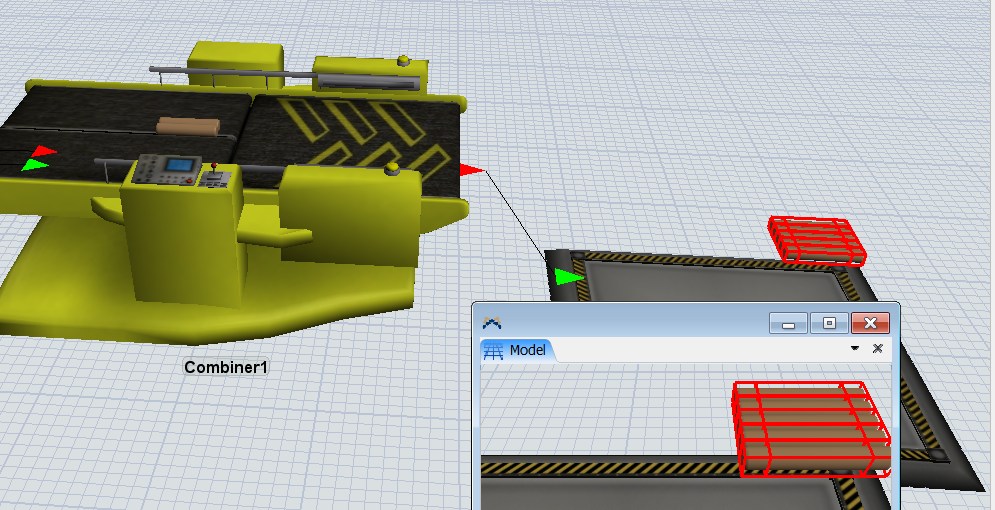
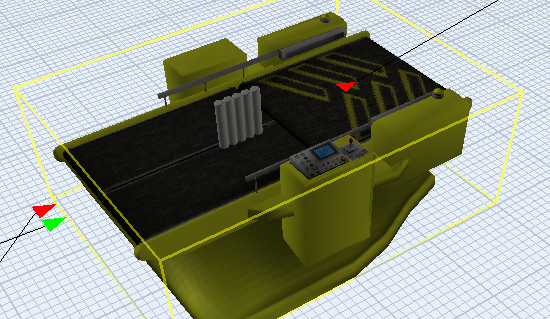
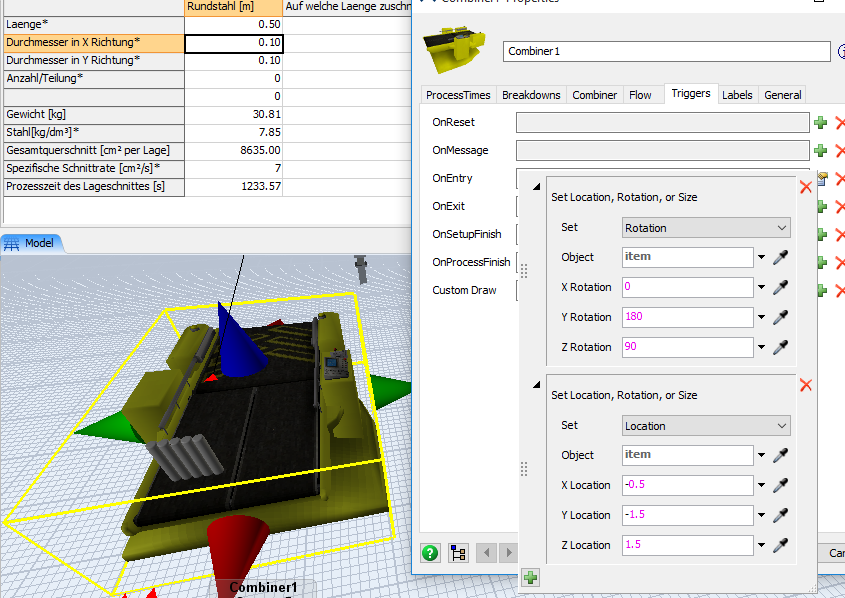
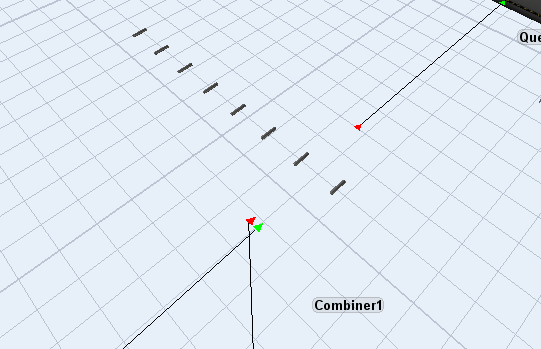
How can I change the position of the items. They should be horizontal and not vertical. I tried it already with the OnEntry Trigger SetPosition, but it did not affect anything.

Thank you in advance.

FlexSim 17.1.2
combinertriggerposition
1332.png (123.4 KiB)
5 |100000

Up to 12 attachments (including images) can be used with a maximum of 23.8 MiB each and 47.7 MiB total.

1 Answer

·
Joerg Vogel avatar image
1 Like"
Joerg Vogel answered Marie Lisa commented

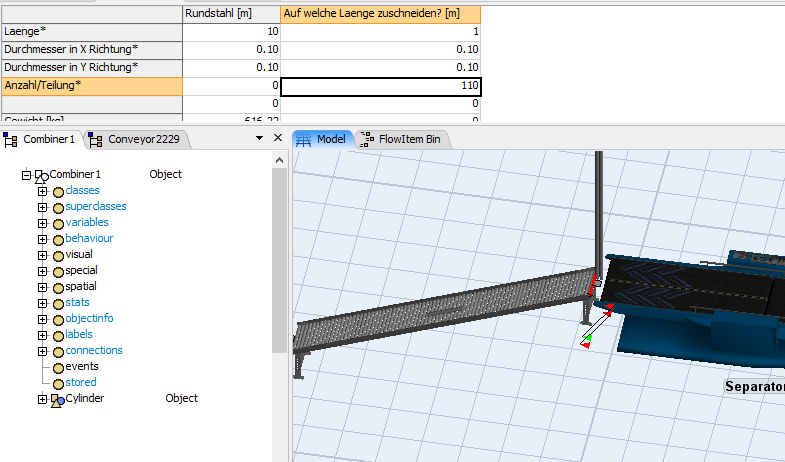
This model packed-batched-items-combiner.fsm works with batched items. OnEntry gets the first item a new rotation and the entering position back. All other items are moved into the first item and lined up side by side. Unfortunately, the flexsim engine evaluates always the x size to place the items in a queue. The visual result is the packed items are colliding in the queue. Also the items hover above the queue.


· 9
5 |100000

Up to 12 attachments (including images) can be used with a maximum of 23.8 MiB each and 47.7 MiB total.

Joerg Vogel avatar image Joerg Vogel commented ·

OnEntry is the right trigger. The picklist option is set Location, Rotation, Size. If the template pops up, set the type to rotation. Then change the rotation x to 90 degrees, y an z to 0.

If I tested this I could see only one item on the combiner in batch mode. In pack mode the second item and further are placed above and in distance to the first at the location of the second item. In pack mode the items must get a location relative to first. But they have to get a different location relative to the combiner while the combiner collects the items. OnSetupFinish is the trigger to change the relative root Cartesian object from combiner to the first item and then the relative location.

If you look in the OnEntry trigger's source code editor you find a reference to the port the item entered the combiner as an integer value named as port. With this information you can set a condition wether the item is the first or later items. The item, on which the others are packed to, enters through port 1.

0 Likes 0 ·
Marie Lisa avatar image Marie Lisa commented ·

I just tried it and the rotation works but not for the alignment of the item. In the attached picture you can see that it now perfectly adds them up one by one. If I could now rotate it around its own axis 90 degrees it would be perfect.

So the items would be laying and not be vertical.

comb.png

0 Likes 0 ·
comb.png (147.9 KiB)
Sebastian Hemmann avatar image Sebastian Hemmann Marie Lisa commented ·

Does the items only lay on the combiner, or in the whole process?

If in the whole process, did you try to Change the Rotation of the items in the flowitembin?

0 Likes 0 ·
Joerg Vogel avatar image Joerg Vogel commented ·

To avoid this I would enhance @sebastian.hemmann's suggestion and change on entry the size of the item in the fashion that the x-size and z-size exchange their values. Then I would change the shape's rotation and adjust the size and location. Then it is a matter if the items have to convey on the combiner. If they do I move them into the first item, if not, then I change the location relative to the model.

Object's size, location and rotation parameters begin their names with spatial, the shape's parameter with offset.

0 Likes 0 ·
Marie Lisa avatar image Marie Lisa commented ·

@Jörg Vogel
I just tried to understand your custom code and up to now everything is great.
Thank you very much for your help.

Can you just tell me how to lay down the items without any distance to each other?

Thank you in advance.

f3.png

0 Likes 0 ·
f3.png (25.5 KiB)
Joerg Vogel avatar image Joerg Vogel Marie Lisa commented ·

@Marie Lisa can you please attach a picture where the item is highlighted (yellow frame) or selected (red frame)? Then I can see the object size in relation to the shape size. You can try to post the code, too.

0 Likes 0 ·
Marie Lisa avatar image Marie Lisa Joerg Vogel commented ·

@Jörg Vogel
I will attach the whole file.
It just has to be without any space in between the items.

Thank you.

trennschleifmaschine.fsm

0 Likes 0 ·
Joerg Vogel avatar image Joerg Vogel Marie Lisa commented ·

I adjusted the model to the suggestion I made. In the model I am trying to find a solution to use a combiner with a pallet item, too, as you have built this yourself. It copies in the ExitTransfer of the conveyor previous to Combiner1 the items to a queue. Unfortunately I am not near to find an answer or to place the items in a line on the pallet or a box. Somehow the engine places the item first and then starts to rotate next to the centerpoint of the item. But after this has been done the transformation in x,y,z in the quick properties hasn't any correlation to the transformation in the OnEntry trigger or I haven't found any. I am still trying.trennschleifmaschine-jv.fsm

The separator contains the standard approach to unpack the items again. The next conveyor transfers the items in a similar look as the previous conveyor when the items were still packed. This is just a fake because the items aren't conveying side by side from the entry of the conveyor.

@Marie Lisa

0 Likes 0 ·
Marie Lisa avatar image Marie Lisa Joerg Vogel commented ·

Hey @Jörg Vogel

Thank you for your answer.
Maybe I could just shut down the item view for the separator, is this possible in any way?

A bigger problem is, that when doing this with the combiner when trying to separate a whole cut per layer it does not happen. The only thing the separator does is to cut one by one and only the first bit of the OnExit expression. Just take a look at the attached model.
It should cut all the combined items a little bit down and then press the whole layer forward and cut the next bit and so on.

Is there any possibility to simulate this ?

Thank you in advance.

f5.png

trennschleif3.fsm

0 Likes 0 ·
trennschleif3.fsm (892.7 KiB)
f5.png (71.7 KiB)

Write an Answer

Hint: Notify or tag a user in this post by typing @username.

Up to 12 attachments (including images) can be used with a maximum of 23.8 MiB each and 47.7 MiB total.